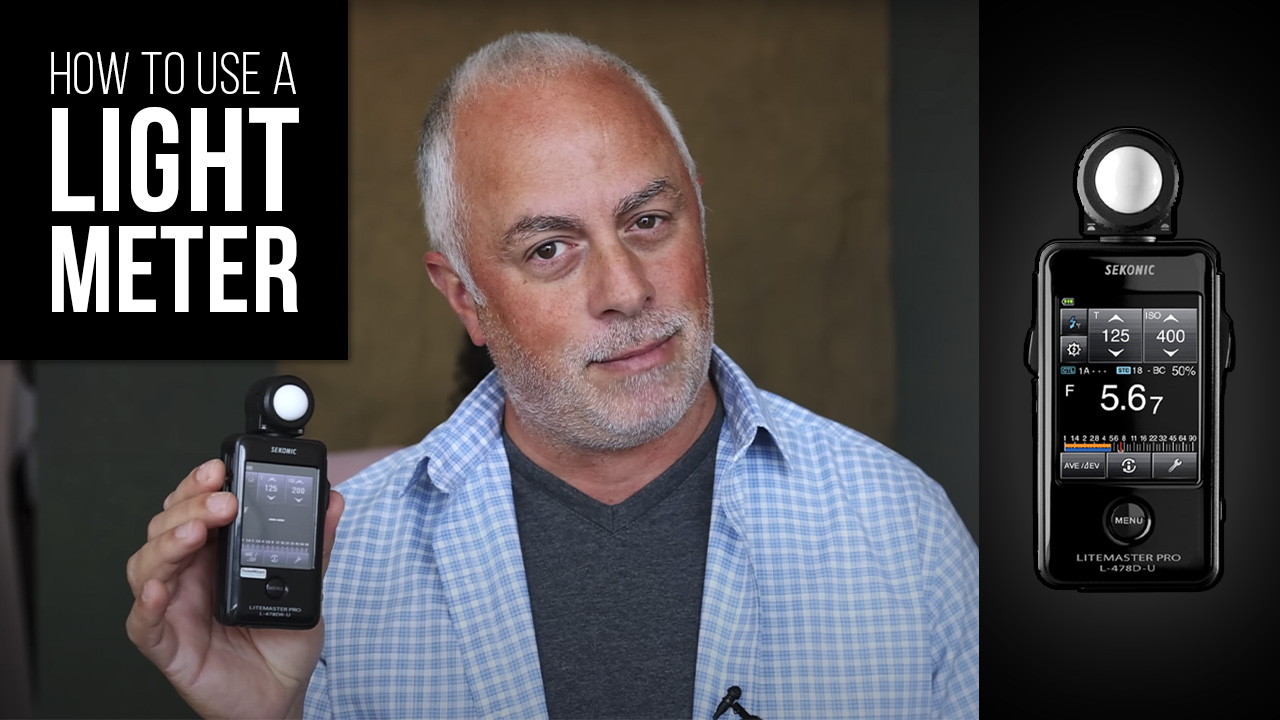
Frustrated with using a light meter? In this video, I show how simple and straightforward it can be to start using one for in-studio portraiture with Sekonic light meters.
Afraid to use your light meter for in-studio portraits? Let me show you how easy it can be.
What’s up everybody? This video has been one of my most requested, with frequent messages in the comments asking for it: “Please, make a video on light meters. As you see me using them often.” Even if it is something that doesn’t apply directly to you now, don’t skip over this video! You might learn something. Do your best, learn, and master your craft. Give me just one second to show you how effortless this can be. First things first – there are plenty of photographers out there who muddle through with no real plan or guidance in sight. As they use trial shots to find what looks the way they want it, adjustments may need to be made and tested again until it looks right. While I won’t judge your process or approach, a light meter offers another method that’s simpler – not overly complicated to use either!
As someone who doesn’t currently use a light meter, I think many of you who do might be surprised by its ease of use. Perhaps you don’t use one because you simply don’t understand it? Or maybe “well, I don’t do it because I don’t know how.” Let me show you, it’s super easy. One important point to keep in mind is that you will use the same exposure triangle if you will – ISO, shutter speed and F-stop are the three settings involved here and each gives an indication of brightness or contrast for readings based on just two settings. So to achieve maximum control you will use your camera in manual mode; set shutter speed (which should sync at 200th of a second if flash photography is being used in studio environments); choose F-Stop; set Fstop for readings using both settings – then click F-Stop until readings appear from two settings to give a reading from two settings alone based on two settings alone!
So let’s make this straightforward: Just set your shutter speed to sync speed (either 200th or 250th of a second, depending on your camera) and then set ISO. Many studio photographers unless using cameras that naturally operate at different ISO settings will likely choose between ISO 100 and 200 as their baseline settings for shooting in studio environments. Perhaps speed or low light situations require you to push this even further – simply set these two numbers accordingly. Once the two numbers have been set, a light meter will help determine your F-Stop number – just take note: once this step has been accomplished, any further editing or adjustment would require another light meter! Now, while you might think, “But I can already do that when taking test shots and adjusting,” in reality that is correct and that theory doesn’t hold water; here’s why light meters exist: they give photographers access to additional light sources which they wouldn’t otherwise have.
When working with one light, that’s fine; I understand if it may be faster to take a test shot, adjust and move your light forward or back to get your test shot, but things change when working with multiple lights – that approach won’t work as effectively due to trying for lighting ratios (I made a video showing these), which are things like 2:1, 4:1 or 8:1. When trying for lighting ratios you would use multiple main lights firing at F/5.6 with multiple fill lights firing at F/4 to achieve desired ratios.
What’s the difference? One stop of light. But how can you manage that without a light meter? Trying to guesstimate where things should fall is futile; using one is absolutely crucial in getting it just right. As I will demonstrate shortly, I would take measurements individually: My key light, for instance, measured 5.6. Once that key light has been turned off and measured as part of the fill light measurement process, then hit the button, fire that fill light, and look for F/4 values. That will create a one-stop difference in light. I could measure hairlight with this device and ensure no highlights or shadow detail is lost on people with blonde or dark hair – making the exposure process quick and simple!
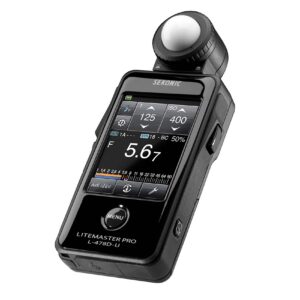
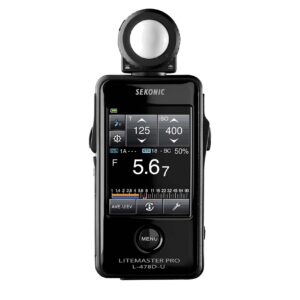
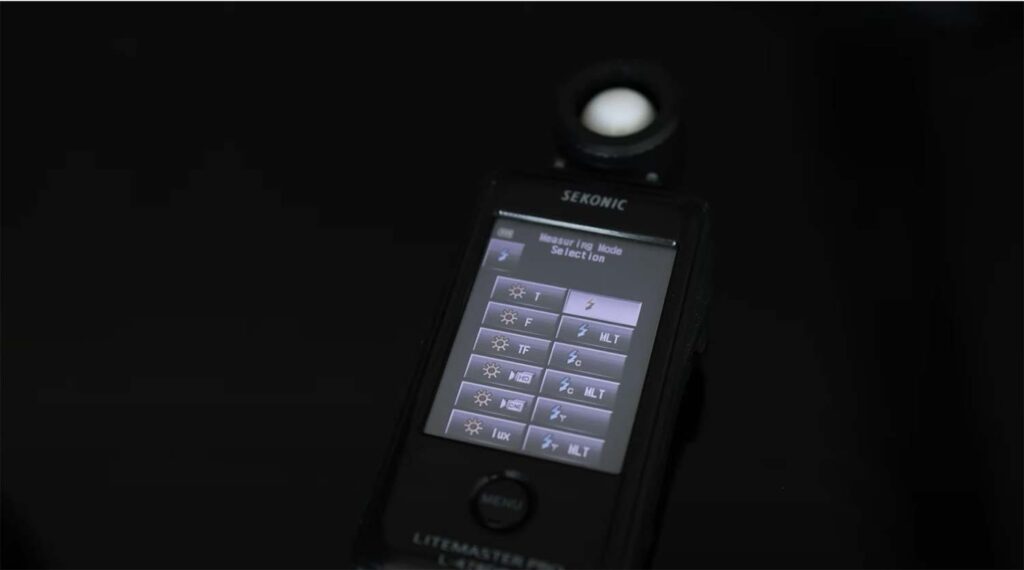
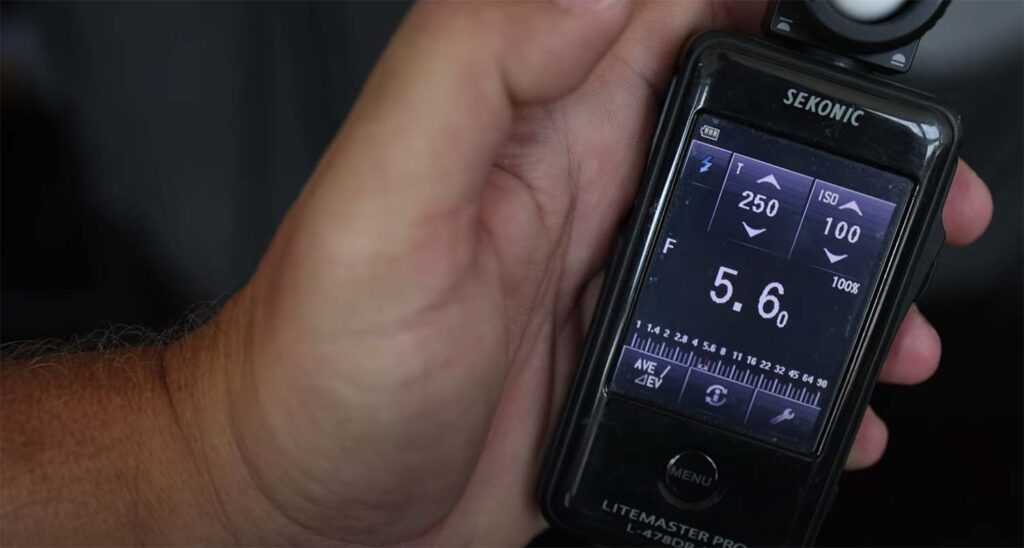
So let me break it down for you and walk you through it. In my studio I use an old Sekonic L’470 DR-U that was intended for cinema use. Here’s where the magic happens – in flash mode we tell the camera we want to measure flash rather than natural light – this enables a seamless blend between flash and ambient lighting for more pleasing shots using flash photography. In another video I will demonstrate using light meters outdoors under natural lighting conditions as well as how to blend flash with ambient light for optimal results using flash photography!
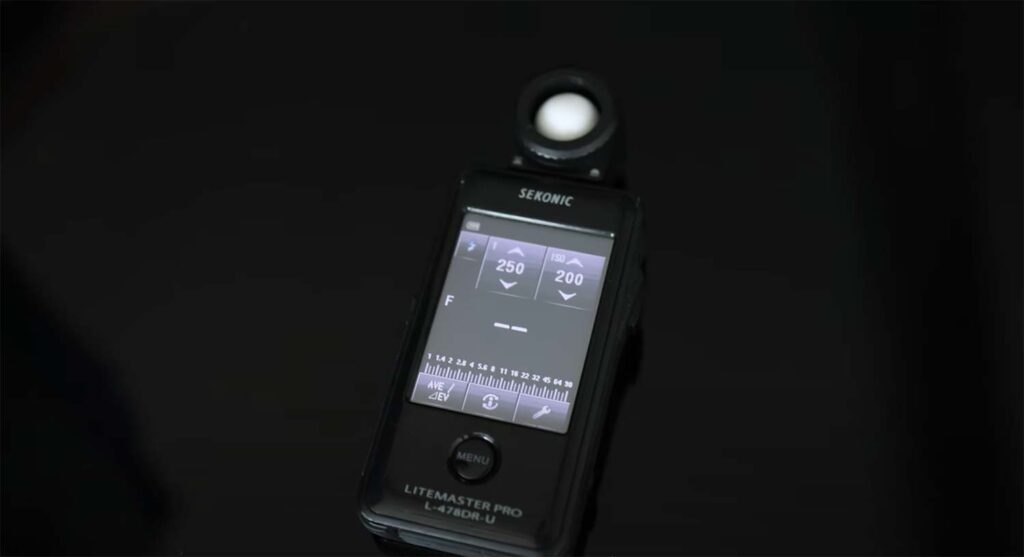
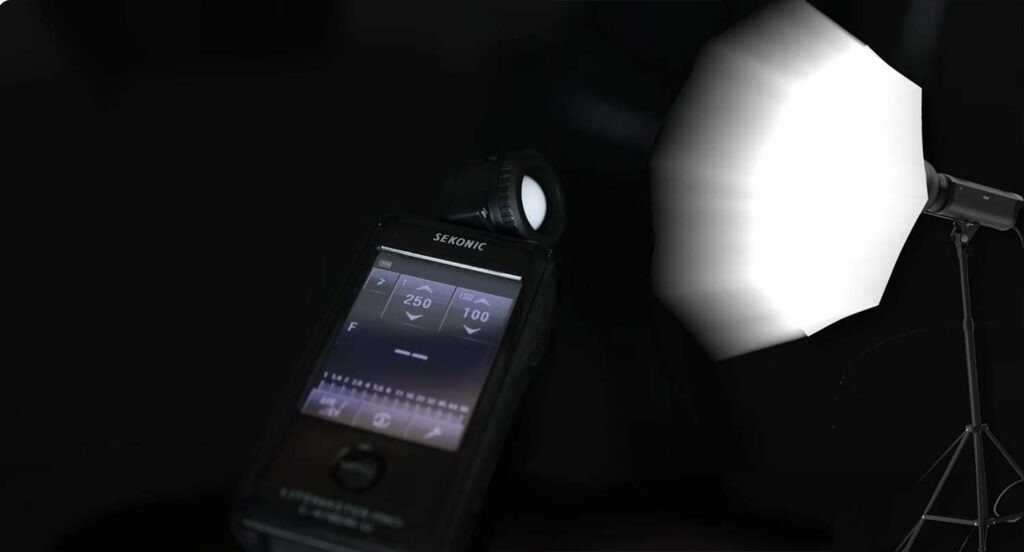
So we need to set our light meter. I’ll select that lightning bolt so it knows it’s flashing. Now look at F-Stop; nothing is there as I haven’t triggered anything yet. And if I trigger this, nothing is going to show up because there’s no flash fire; so, nothing shows up either. T is your shutter speed setting – when working with flash photography it is best practice to be in manual mode for optimal results; I strongly encourage studio photographers to be as manual as possible when shooting flash photography. Here’s where you set your ISO, mirroring what’s happening on your camera. So if you want to set ISO 100 and shutter speed 250th of a second or 200th of a second – these values need to change here too. After setting that, stand in front of your strobe and trigger it; I will show you how soon. That will provide your F-Stop value.

Let me break it down for you and walk you through it step-by-step. For my studio shots, I am using an old Sekonic L’470 DR-U light meter meant for cinema. Here’s the first thing you want to know – What mode are we in? Look for the little lightning bolt icon – that indicates flash mode; that tells the camera we want to measure flash not natural light. In another video on using light meters outdoors in natural lighting I will explain how to blend flash and ambient lighting to get very nice shots using flash.
Therefore, to set this, whatever light meter you may use, I’ll select the lightning bolt to indicate it is about to flash. Now, as can be seen by my F-Stop number there’s nothing there since I haven’t yet activated the camera flash. Triggering this will have no effect, since there will be no flash fire to trigger it. T here indicates shutter speed; more often than not when working with flash photography you should use manual mode; I highly advise practicing this way when shooting studio work. So here is where you set your ISO, which mirrors what’s happening on your camera. So if you want to set ISO 100 and shutter speed 250th or 200th second respectively, simply change these values. After setting these, stand in front of your strobe and trigger it – I will show you how in just a moment; doing this will give you your F-Stop value.
Adjustments can then be made. One tricky area involves this lumisphere here – should it be up or down? On this lumisphere, I typically work with it set low as I want a direct measurement of light hitting it. So what I tend to do is point this directly towards my source of illumination and measure its light levels. But with the bulb out, I’m getting more of an 180 degree measurement, in addition to 360 degree measurements around that one point – not what I want! Since pinpoint measurements are what’s being tested here, my preferred way of using it is pointing directly at my light source with lumisphere retracted and taking readings as needed.
Just one light will do. That is all there is to it; nothing more difficult. So let’s put this into practical application. Hopefully this makes sense and super straightforward. What I will do here is show one light for illustration purposes only. However, you need your trigger for your light system, even if that means using an old technology like PocketWizard. No matter the trigger you use for that flash that fires off from behind the camera. Let’s just crank the flash power a bit higher as it is quite bright here; I’ll set it to power five. Here I am using an FJ200 with Octa Box attached; at first I will hit test, then measure.
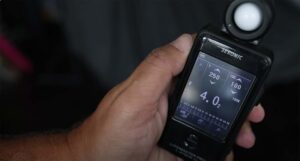
Now I’m going to measure it. For example, if I had a model here with me that was lit by an outside source like sunlight, then this device would point directly at it, measure and then trigger. And this gives me an approximate reading of 4.02. So if I didn’t make any other adjustments, and all else being equal, I would set the F-Stop of my camera to 4.02 to ensure an exact measurement of light – making post production much simpler! Just so we’re clear: don’t be misled by what you see on the back of the camera; it lies 90% of the time! Your LCD screen on the back of your camera is not accurate – the only accurate way of telling whether exposure levels are too high or low is using a light meter; otherwise, view your histogram which we will cover at another point.
Let me just be clear: LCD screen on your camera often lies. Let’s say your LCD is set at 4.02 and I decide I want to shoot at 5.6 for whatever reason, I need to adjust my trigger accordingly: from 4.02 to 5.6 is approximately equivalent to one stop of light; to do that I will move this from power level five up to power level six (since 4.02 was power level five) before taking another test shot using this same process: hit measure, point it directly at the light, hit test on my trigger, now I’m at 5.63!
As I mentioned earlier, I just said something that wasn’t correct. When measuring on the light meter and firing the trigger, hit measure only once before measuring with your light meter again and firing your trigger. So let’s try that again and note how my reading was 5.62, meaning two/10ths too hot. So I dropped down to 5.7 then moved it down another 10th stop until hitting measure again at 5.61 and still being off a stop or so, eventually moving it back up one stop to 5.61 again with hit measure again at 5.61 or so as time goes on I might drift off slightly off; therefore when working with talent or head shots I put gaff tape onto the floor once all lights have been metered in to know when exactly I am set up so I know that my exposure is at 5.6 flat, something you guys can see gaff tape is set so I know I am set at that spot on and make adjustments accordingly if necessary if necessary – that way everyone involved knows where my exposures stand when working with talent or head shots alike, this helps ensure I know exactly when working from experience alone, regardless of any changes between metered-in or working head shots alike, it helps ensures gaff tape in so as soon as lighting is metered in so as soon as talent/head shots are at 5.6 flat for head shots or talent/headshot is being set up here so they know they know I am at 5.6 flat for head shots when working 5.6 flat for head shots or work requires it’s place or off by an 8th stop off one stop or head shots are set at any given head shots are set 5.6 flat and you know when I am working or you know whether we work 5.6 flatness as soon as drift occurs by puting tape placed somewhere on floor when set-and that piece can places something is taken which ensures put 5.6 flatness is being set-for headshot so long enough. Once lights metered- it knows this time or when work; usually placed by doing headshot set- so. You guys can be set 5.6 flatness! (you sees). You guys that this place. You know this point-simply at 5.6 flat in terms. You guys can see they can spot on. If any off. You guys can see when working (eor headshot when working or headshot by placing something you know your lights for headshot to set for when we work 5.7 or when we know I put piece if any drift when working (in/or set… If gaff tape is when they can easily spot that’s done quickly as soon. When working without need.) or working head shot this may or something like). For head shot). So usually do have!). You know where 5.6 flat.) For head shots work that set to), for whatever 5.6! 5.6 flat.) it.) or head shots when working, when set.). So set that way before set… This might just before it too or whatever set!). or whatever… If/or someone’s placed here or similar then set.)! (not.. when working!). You guys can see when working!! When working/head shots/work…….. When working!…… When setting…!! = 6 when using these or any head shot, when working 5.6 Flat would. When working or head shots or working!… It shows where exactly 5.6 flat! You 5.6 flat (i) when shooting.) set…….). So usually put 5.6 flat!). For head photos/ photo’s or wherever).. It could even set that
So we’re at 5.6, and I know my camera allows me to set the exposure at that F-Stop value – we were shooting at 200th of a second with ISO 100! Now I know every frame will be perfectly exposed. However, in multi light setups with multiple lights I might take two separate shots with my secondary light at one stop difference from F/5.6 before turning this light off and measuring this one until they reach F/4.
I would use the same process when setting hair lights, edge lights and background lights – this is how a light meter works! Now don’t be shy to let me know in the comments what you thought – you guys have been asking for this video, wasn’t that easy? So up your game, master your craft, get yourself one of these, and it may even be time for Sekonic to send me another meter because mine has already become obsolete (I beat up on mine a lot!). So give it a go and let me know in comments whether you do or don’t – I bet you won’t regret trying. See you soon in another video.