
Are You Ready for Some Low Key Beauty Portraits in My Studio? Creating low key beauty portraits in my studio can be great fun, and following along in my step-by-step tutorial video will allow you to produce stunning portraits for your clients! Even as a beginner photographer, this simple lighting technique can add stunning portraits for them!
Ready for some low key beauty portraits? Let’s get to it.
So today we’re going to try some low key portraits. What exactly are these? They typically involve dark shadows and moody lighting with dramatic effects; usually one light source (perhaps from a reflector) can add even more drama than expected to your portraits, especially when done in black and white! Let me walk through each setup here before we get started so we’re on our way. We have three or four different setups ready for Lauren here that I will go over.
So I’m shooting with a Canon RF 28-70 and Canon R5 on camera and for lighting we are using a Profoto B10 with a zoom reflector rigged to it, along with a 20 degree grid grid – to really control that light and limit spill. My aim here is to go dark in the shadows so as to control where she’s receiving light from.
Something else that matters in low key portraits, I believe, is wardrobe. Lauren wears black for this shoot; although bright vibrant colors might work as well. That may prove challenging though! My approach when shooting low key portraits involves using light and shadow to control where the viewer looks first – my goal being that their eye naturally goes towards brightest areas first; with no color or brightness in other areas except skin; our goal should be for that to happen naturally regardless of how we move or pose Lauren – that will determine where we look next and ultimately what kind of final images we end up with!
So let’s just begin shooting. I will guide you through how to adjust the lighting – which is really simple with one light setup with grid. We have dark background and wardrobe pieces as well as a top hat here; and at the end we will add this red sheer for bonus shots! So let’s just get this underway.
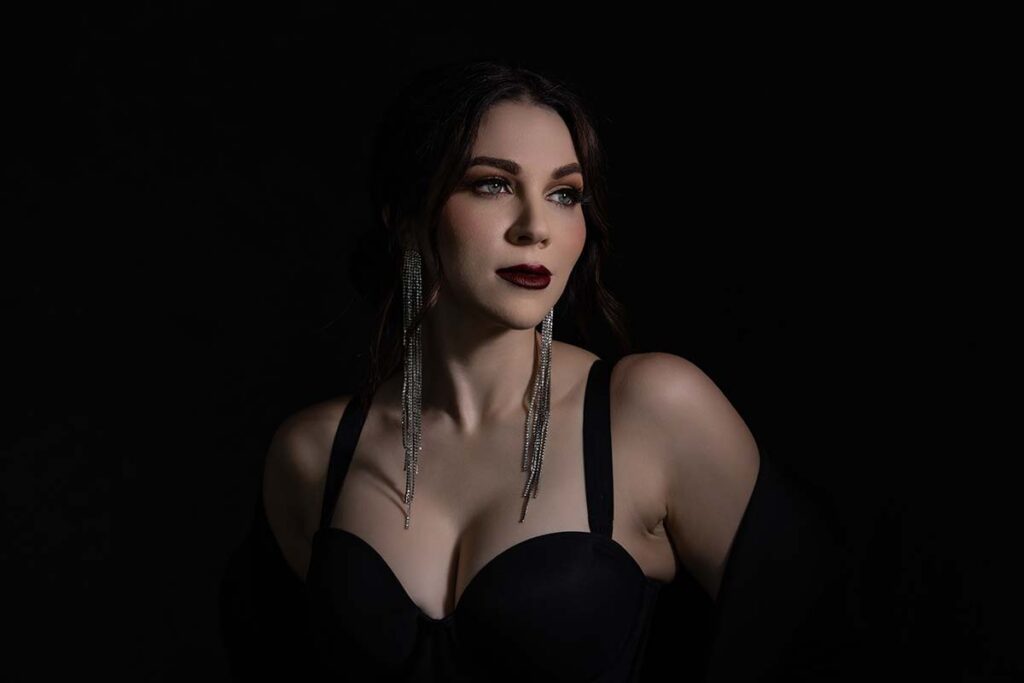
Look 1
I want Lauren to stand here while I adjust the light, so I have my grid ready and am firing it directly at her; she should look straight into the camera while gazing into it for maximum intensity of split light effect. While that look could work for something more beauty/fashion focused, but juxtaposed against beautiful models could look fantastic; you have soft lighting used typically on men that could work for female subjects too – it can look really stunning when used this way with hard, harsh lighting effects on a beautiful model like Lauren – juxtaposed against one another!
First thing I want to do here is bring out my light meter, switch into manual mode (which I use whenever in studio), set ISO 100 and shutter speed 200th of a second, and make adjustments as necessary until we reach 5.64, where she had the most skintone contrast in this shot. So now we are at 5.64 flat, so just to clarify for everyone, this was shot with my Canon R5 in manual mode utilizing F6 200th second shutter speed setting with my RF 28-70 F2 lens attached and all my settings as described earlier! So once again just to clarify for you guys: every step taken while in studio was taken while using manual mode on camera to control exposures close enough that I wanted this shot as close to perfect as possible and got right here with her cheek for her cheek a 5.64 reading at her cheek at 5.64 which could have been taken. So to be clear: all this time my camera was on manual mode with F6 200th second shutter speed setting using ISO 100 and shutter speed 200th second shutter speed with aperture set to 5. I wanted this picture taken with Canon R5 with Canon RF 28-70 F2 on camera using manual mode on camera mode F6, 200th seconds shutter speed, using manual mode on camera along with Canon R5 for each picture taken to perfection with every shot taken on shoot day of shoot day 7. So once more to complete perfection that now we’re at 5.
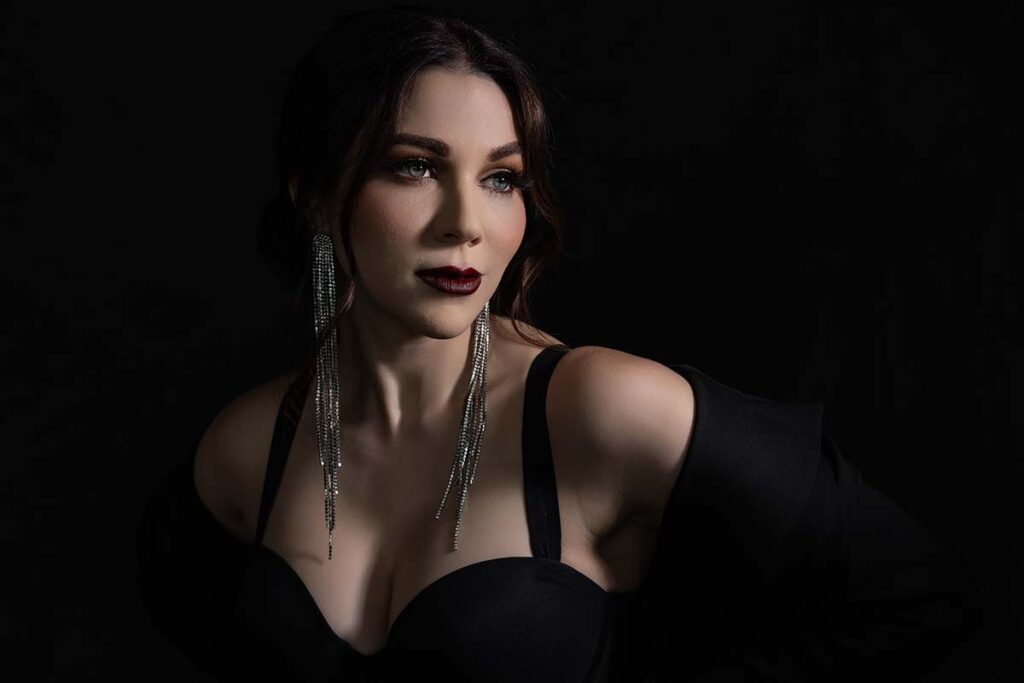
Let me just take one final test shot here before moving forward with any real shots. What you are going to see here is my initial portrait shot as well as its test. Notice how there are shadows appearing here which is not very pleasing and may compromise light control in general; yet the exposure seems correct. As the highlights are present and shadows are falling off to camera left, my job now is to adjust her pose and direct that light source more toward camera left, perhaps even decreasing it slightly. As you can see in that test shot, too much light is hitting her upper chest area and is too bright. So I prefer reducing its intensity slightly by simply decreasing its angle of approach a little bit; still want it illuminating her chest, face, and neck but at less of an acute angle; therefore you need to adjust this light source appropriately.
Test Shot #1

Settings: f/5.6 @ 1/200, ISO 50
Height matters as well. So let’s lower this onto Lauren and take one last test shot as now that light is closer to her face and has increased from 5.6 to 8.0. At this point, it becomes obvious why using a light meter is important: I just dropped this down by one full stop on the trigger until we have 5.6 flat. We should now be back in business; let’s take another test shot to ensure everything looks just right – and here comes test shot number two with improved shadow direction than in image one! Now this image will serve as my starting point and I will move the subject closer towards that light source.
Test Shot #2
Settings: f/5.6 @ 1/200, ISO 50
As for Lauren, I don’t want her looking directly into that light. To accomplish this look, her chest needs to remain still while I move her face and eyes into this spot. Next, let’s use her shoulders to roll this forward shoulder up towards her ear lobe; gorgeous. Lips together soften expression a bit; love this! I even like her looking down!
Settings: f/5.6 @ 1/200, ISO 100
Settings: f/5.6 @ 1/200, ISO 100
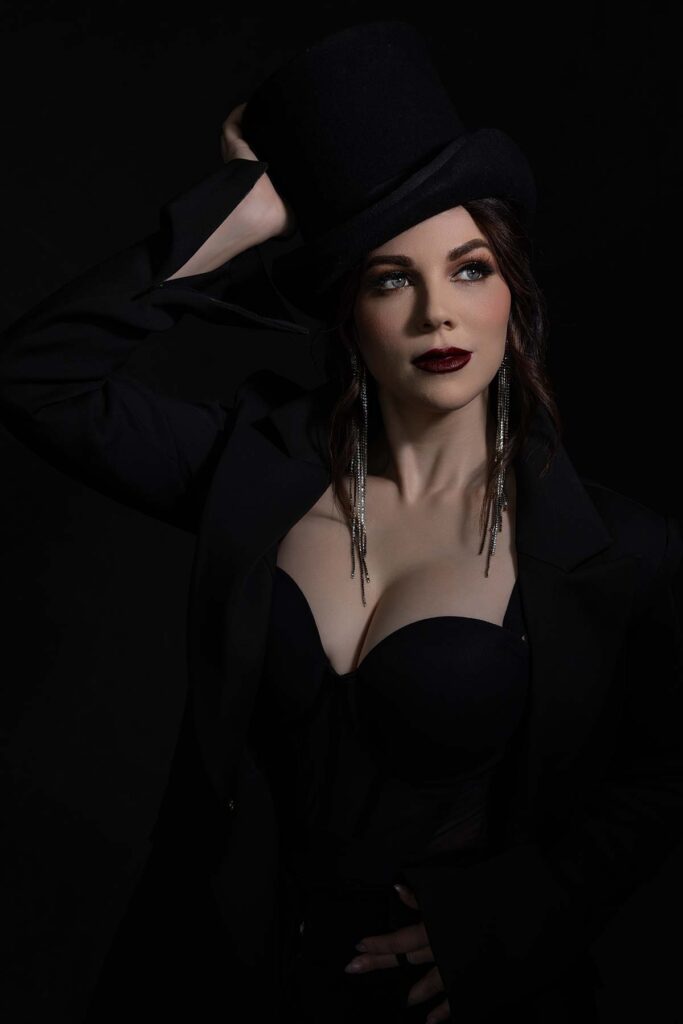
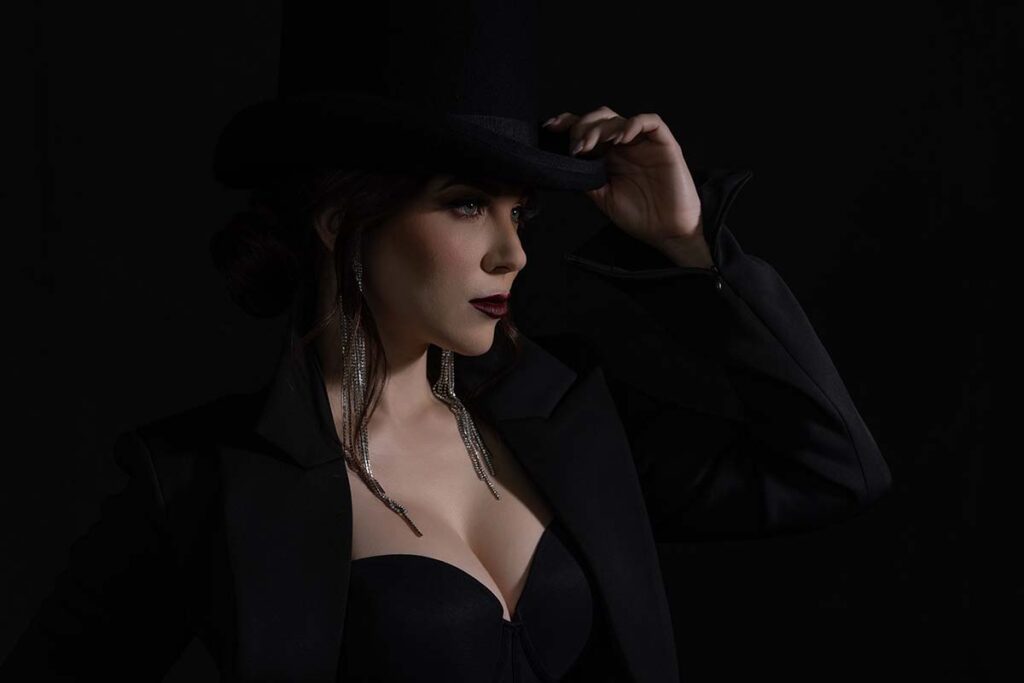
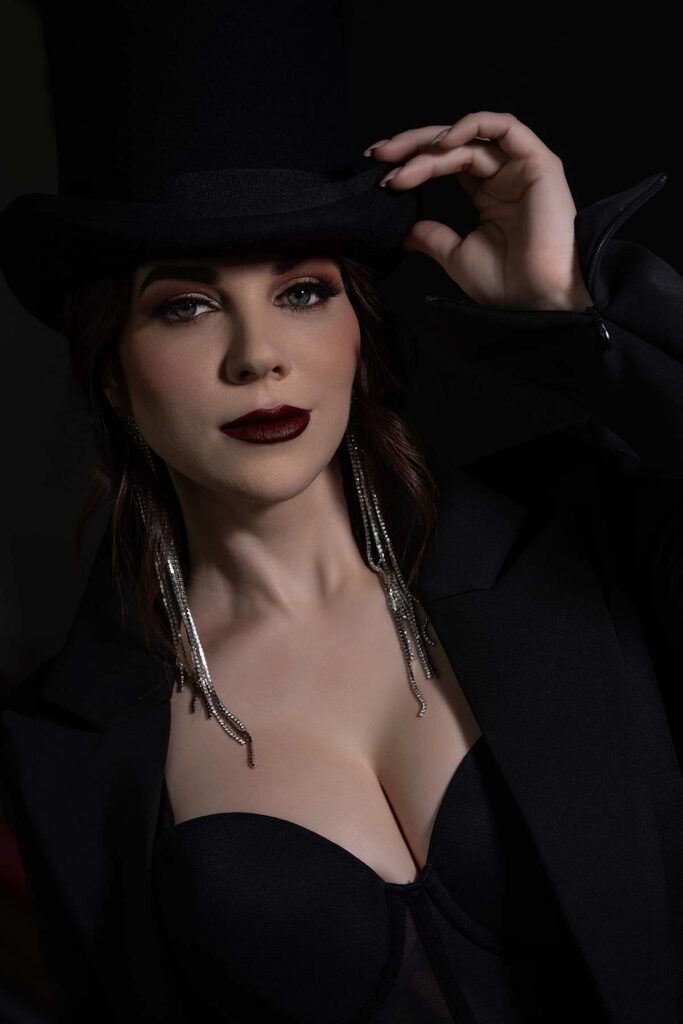
Look 2
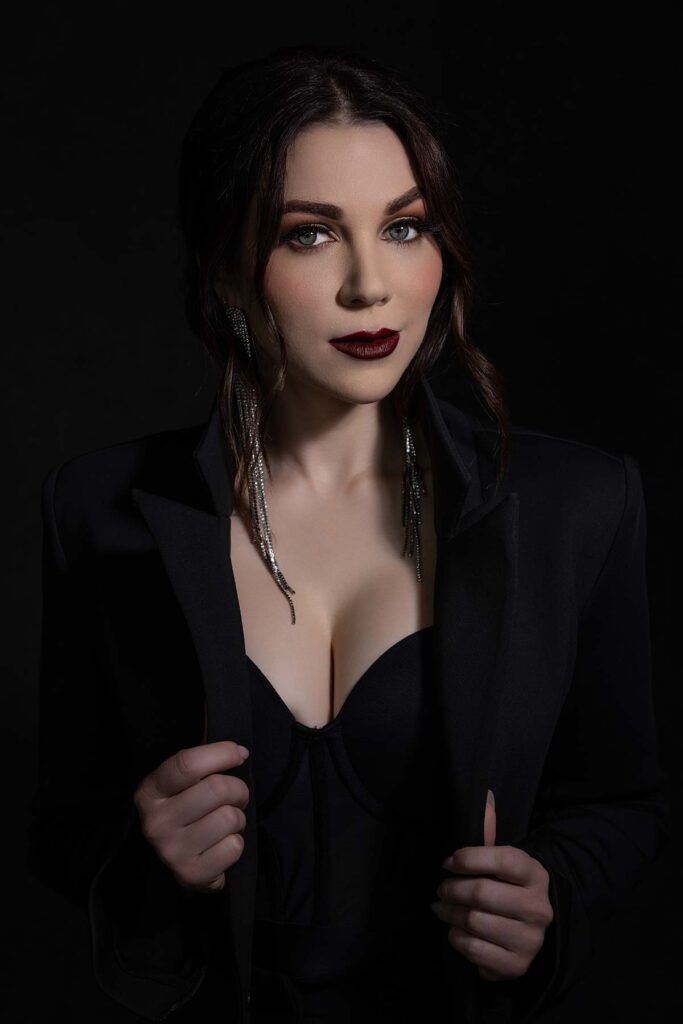
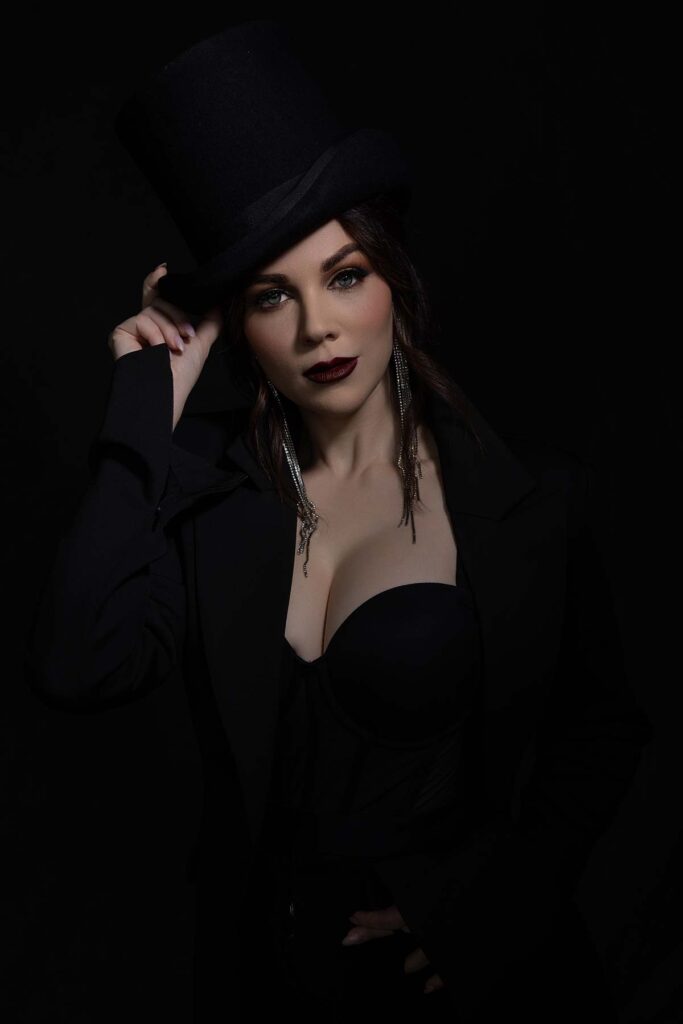
So we now have one particular look with a low key shot, which I find particularly attractive. Now what I want to do is add a hat into this image; let’s see how your jacket sits over your shoulders with its popped collar; let’s stagger our hands for maximum effect and gorgeousness!
Settings: f/6.3 @ 1/200, ISO 100
Now how can we photograph this hat? We’re building towards this shot; it needs to be cockeyed. What if we use this light source instead and raise up slightly higher? I love this. What if her hand came across instead? That would give the desired look out of her, beautiful. Now what if it appears as though someone were pulling back her hair with their hand – that shot really draws my interest.
Settings: f/6.3 @ 1/200, ISO 100

Settings: f/6.3 @ 1/200, ISO 100
Settings: f/6.3 @ 1/200, ISO 100
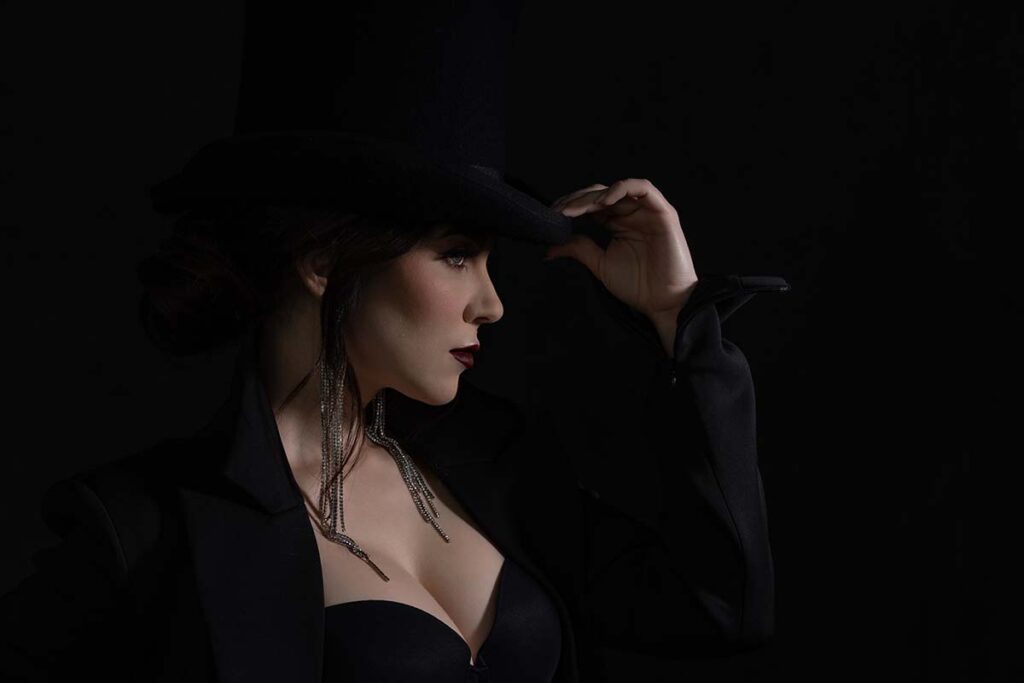
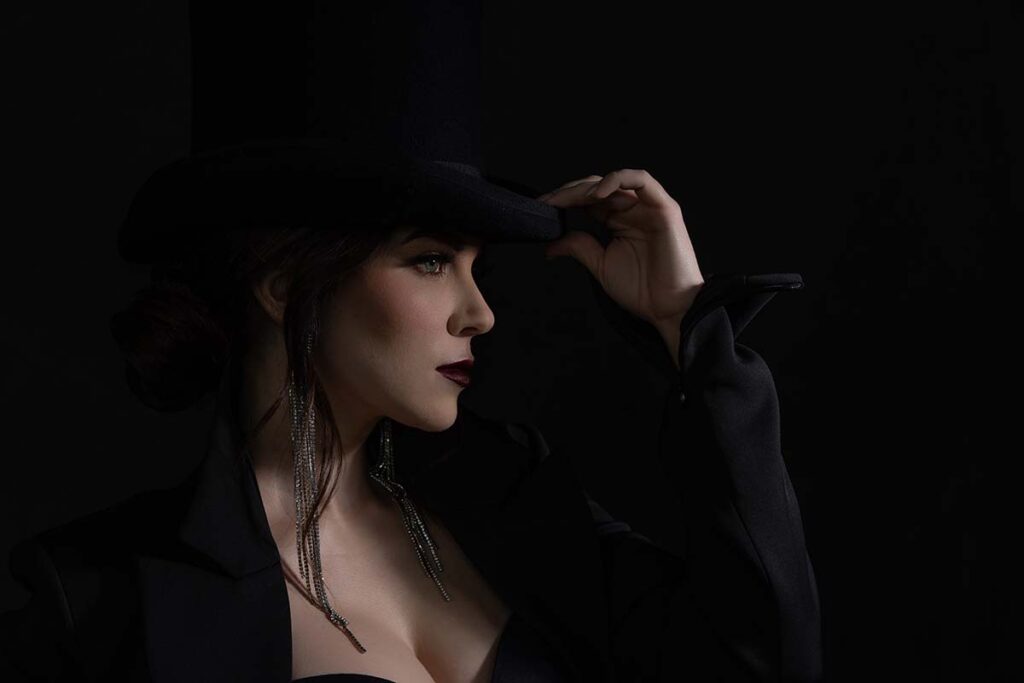
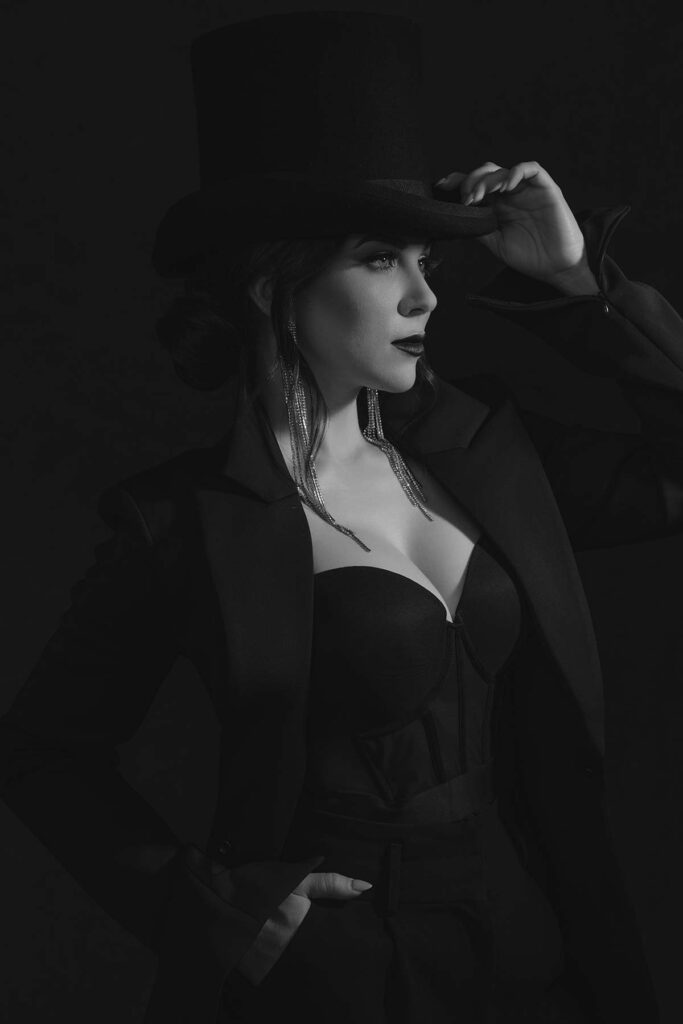
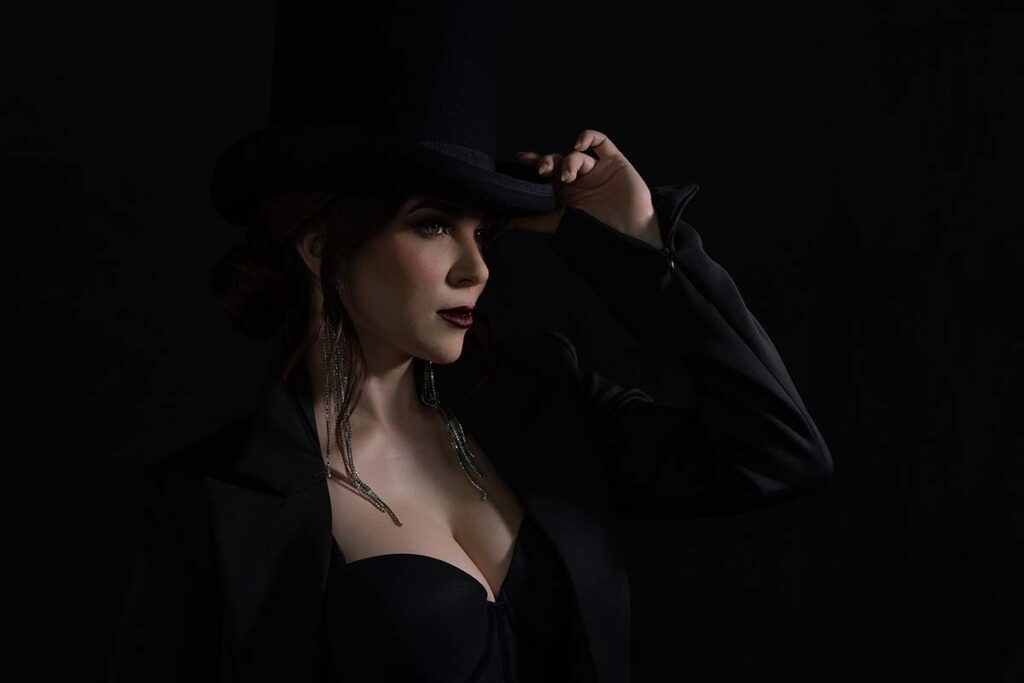
Now I want to shoot more profile. I don’t know whether or not I want the hat, so let’s do a test shot and see what looks best. Lauren will look directly at the light. Ideally I want her elongating her chin out while we may need to square up with our hat choice.
Settings: f/6.3 @ 1/200, ISO 100
Settings: f/6.3 @ 1/200, ISO 100
Settings: f/6.3 @ 1/200, ISO 100
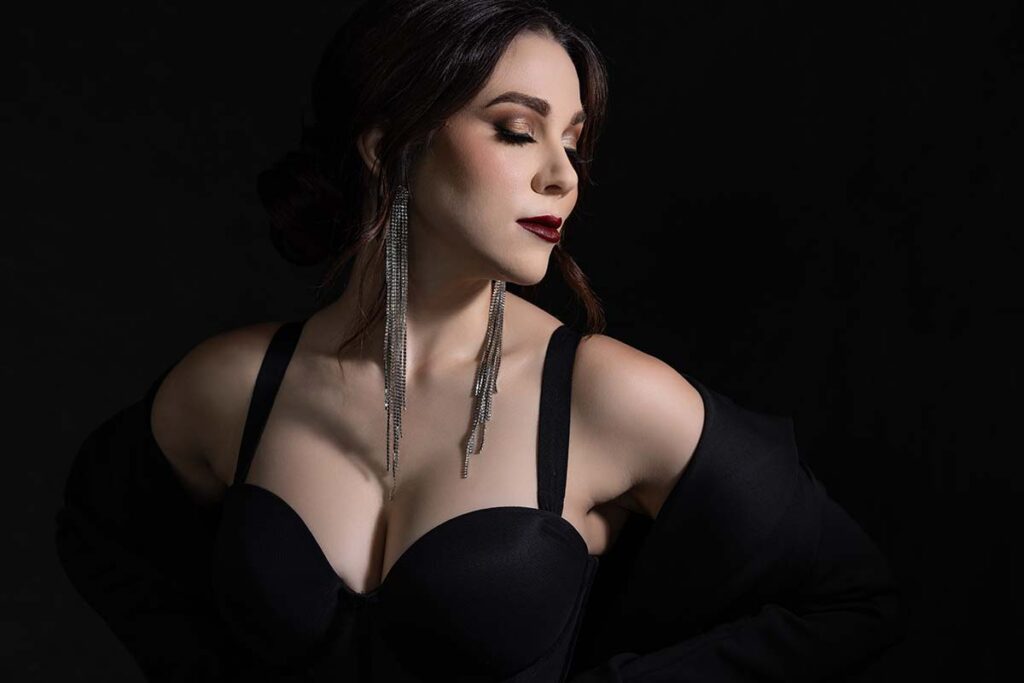
I love my shots, but they are leaning too heavily into complete blackness. Although a low key portrait may require that, I want to push back some light. We are going to use a Profoto reflector here with silver rather than white because I want something that provides more specular focused illumination that has a harsher tone that pushes back light. So you just try being here when we use it – pose looks good; yes it works perfectly well for me.
What we’re attempting, and succeeding with, here is adding short light onto her face. My light is cheating just slightly while giving her an appealing shape on her face and helping to fill in some shadowy areas a bit more effectively – I love this look.

Settings: f/6.3 @ 1/200, ISO 100
Settings: f/6.3 @ 1/200, ISO 100

Settings: f/6.3 @ 1/200, ISO 100
Settings: f/6.3 @ 1/200, ISO 100
Settings: f/6.3 @ 1/200, ISO 100
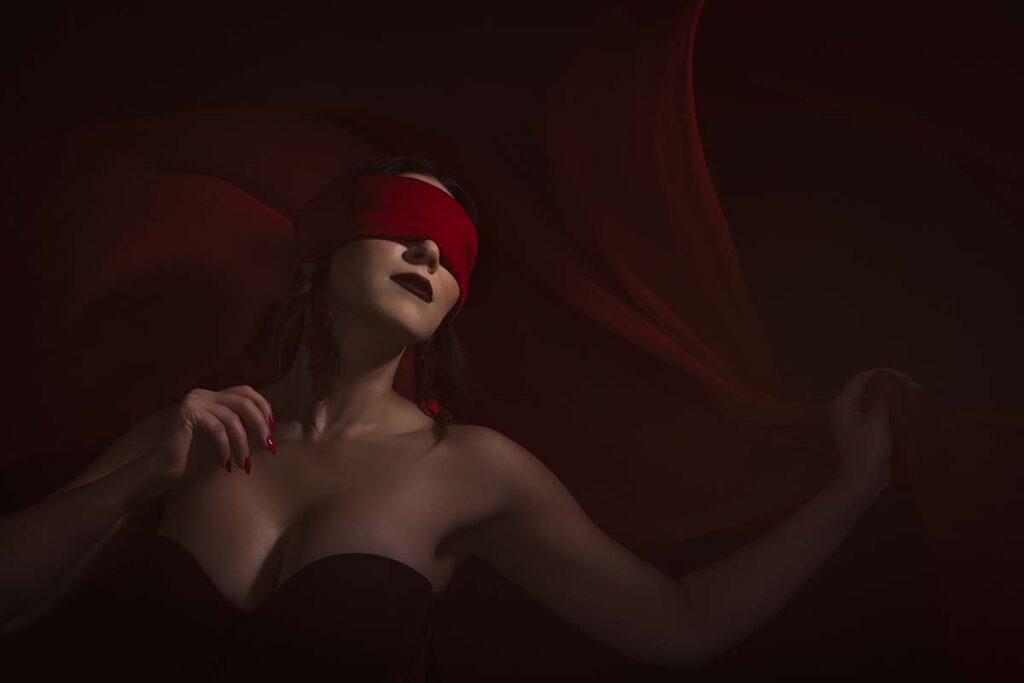
Look 3
Now we’re going for something different with this red fabric. It’s extremely creative and I don’t really know what it will turn into; all I know is I want some kind of movement here – probably on her face with her eyes closed, looking up towards the sky; with somebody behind giving this fabric some bounce so it falls off a bit later on.
Again, this is how I like to work and you should follow suit. Once the shot you want has been captured on film, experimentation should occur – this may turn out to be completely ineffective in which case my wife will likely insist that it remain part of the video – let’s all have some fun while doing this?
So here is my vision for this shot: the lighting will be slightly higher; we have red chiffon that we rolled up into a blindfold for Lauren. There will only be directional light. What I want her to do is look back into that red chiffon while being blindfolded – something more fine art-ish that allows her to experience. Once we have the image we want, this is where we can have some fun and experiment further – let’s get going on this!
Let’s have Lauren arch her belly button right, then step backward with her left foot. Now let’s give Lauren some fabric in one hand while using the other hand to reach up over her chest, flaring out her elbow while relaxing her hand a bit more than expected. Beautiful Lauren! Let me get one last test shot before anything begins flying around here – here we go.
Settings: f/6.3 @ 1/200, ISO 100
All right. So hopefully you have enjoyed this video. Subscribe to my channel if you already do and I hope we see you in our next video together. If this one was your favorite let us know which one it was in the comments, and we hope to see you back for another episode soon.